Automate Receipt Organization with n8n — Drop an Image in a Folder, Get a Google Sheet
Drop a receipt photo into a Google Drive folder and n8n automatically reads it and logs the details into a Google Sheet. A step-by-step guide for anyone trying n8n automation for the first time.
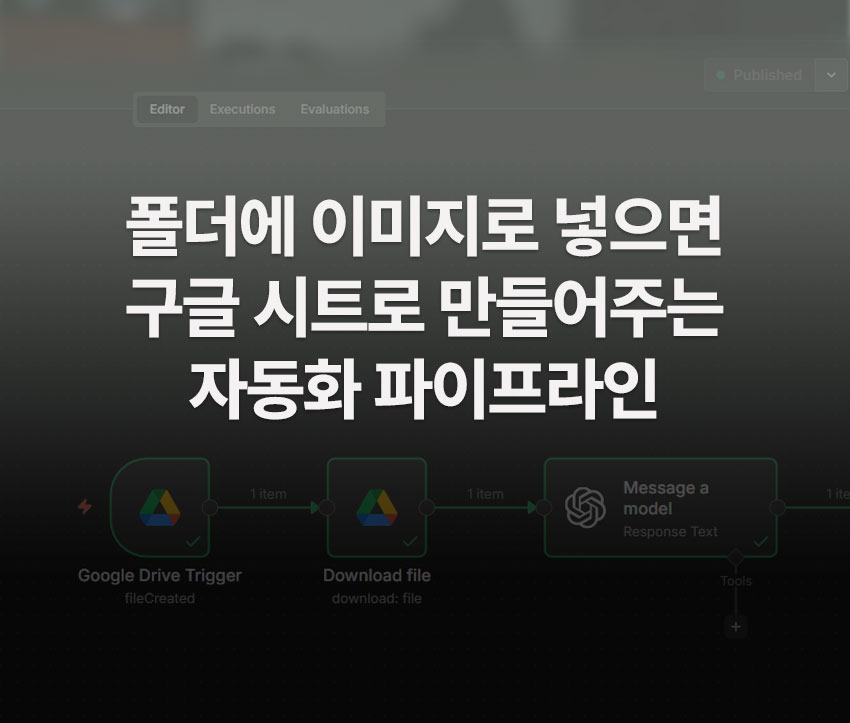
n8n has been gaining a lot of traction lately as a workflow automation tool. The idea is simple: connect apps and services using visual building blocks called nodes — no coding required. Once you try it, you’ll find yourself thinking “wait, this actually works?” more than once.
n8n offers a free trial to get started. That said, if you plan to use it in production, you’ll eventually need a paid plan. Cloud pricing starts at around $20/month (Starter), with higher tiers based on the number of workflow executions. For now, the free trial is more than enough to get a feel for how it works.
In this post, we’ll build a 4-node receipt automation pipeline together. Drop a receipt photo into a Google Drive folder, and n8n will automatically read the image, extract the key details, and log them into a Google Sheet — date, store name, amount, and category.
Once the pipeline is up and running, you can extend it however you like: add a Gmail notification node, log entries to Notion, or build out a monthly expense summary. That flexibility is what makes n8n worth learning.
This post is written for people trying n8n for the first time. You don’t need to know what a node is going in. Just follow along screen by screen and you’ll have a working automation by the end.
Pipeline Overview
| Step | Node | Role |
|---|---|---|
| 1 | Google Drive Trigger | Detects when a new file is added to the folder |
| 2 | Download file | Fetches the file content |
| 3 | Message a model (OpenAI) | Extracts information from the receipt image |
| 4 | Append row in sheet | Adds a new row to Google Sheets |
Before You Start
Get these two things ready before building the pipeline.
Google Drive: Create a new folder in Google Drive called receipts.
Google Sheets: Create a new spreadsheet and add the following headers in row 1:
Date | Store | Amount | Category | Filename
For your n8n account, sign up for a free trial at n8n.io. No installation needed — it runs entirely in the browser.
Step 1: Google Drive Trigger Node
From the n8n dashboard, click New Workflow → click the + button on the canvas → search for Google Drive.
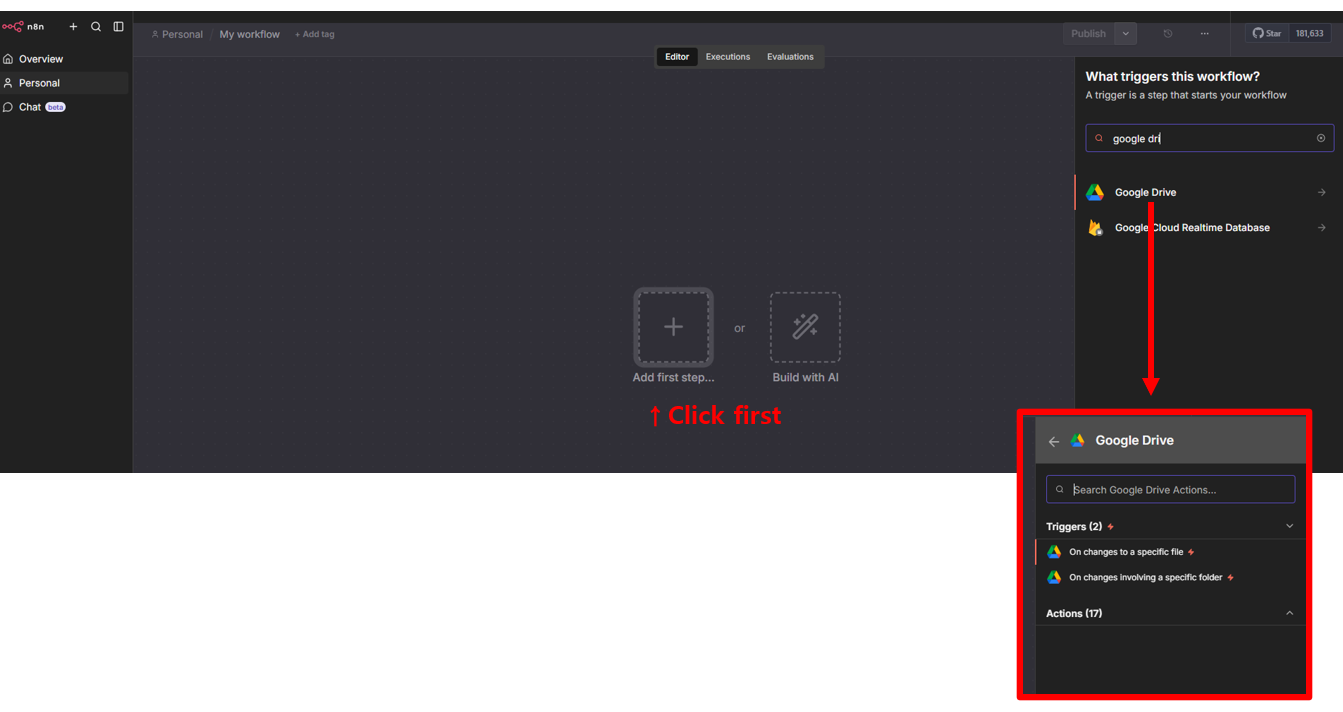
You’ll see a list of Triggers and Actions. Select “On changes involving a specific folder”.
Note: “On changes to a specific file” only watches a single file. To monitor an entire folder, you must select “On changes involving a specific folder”.
Configure the node as follows:
- Credential: Google Drive OAuth2 API — connect your Google account (a login popup will appear the first time; just allow access and it completes automatically)
- Poll Times → Mode: Every Minute
- Trigger On: Changes Involving a Specific Folder
- Folder: Select the
receiptsfolder - Watch For: File Created
Once configured, click “Test this trigger” and upload a receipt image (jpg or png) to the receipts folder. If you see “1 item” appear in the OUTPUT panel on the right, it’s working.
Note: If there are non-image files in the folder (like spreadsheets), n8n may pick those up first. Always test with an actual receipt image file.
Step 2: Download File Node
Click + on the right side of the trigger node → search Google Drive → select “Download file” from the Actions list.
Configure as follows:
- Credential: Google Drive OAuth2 API (same account as Step 1)
- Resource: File
- Operation: Download
- File: Click “From list” and switch to “By ID” → click the Expression tab on the right side of the input field and enter:
{{ $json.id }}
Click Execute step. In the INPUT panel on the left, switch to the Binary tab — you should see an image/jpeg file loaded there.
Step 3: Message a Model (OpenAI) Node
Click + → search OpenAI → select “Message a model”.
Setting Up OpenAI Credits
At the top of the settings panel, you’ll see a purple banner:
“Get 100 free OpenAI API credits → Claim credits”
Click it. n8n will provision free credits and automatically set your Credential to “n8n free OpenAI API credits”.
The free credits support a limited set of models. The only Vision-capable model included is gpt-4o-mini, which is perfectly capable of reading receipt images. If you have your own OpenAI API key, you can enter it via “Set up credential” — just make sure your OpenAI account has available credits.
Node Settings
- Credential: n8n free OpenAI API credits
- Resource: Text
- Operation: Message a Model
- Model: GPT-4O-MINI
Prompt
In the Messages section, paste the following into the Prompt field:
Extract information from this receipt. Respond only in the JSON format below. Do not include any other text.
{"date": "YYYY-MM-DD", "store": "store name", "amount": number only, "category": one of "Food/Transport/Accommodation/Other"}
Connecting the Image
Click “Add Message” → in the new message block that appears:
- Type: Image
- Image Type: “File Data” (you’ll see three options in the dropdown: Image URL / File ID / File Data)
- Image Data: type
data
Click Execute step. If the OUTPUT shows a result like the one below, it worked:
{"date": "2023-03-08", "store": "H Mart", "amount": 23760, "category": "Food"}
Step 4: Append Row in Sheet Node
Click + → search Google Sheets → select “Append row in sheet”.
Select “Append row in sheet”, not “Append or update row.” We’re adding a new row for each receipt, so no update logic is needed.
Node Settings
- Credential: Google Sheets OAuth2 API (connect your Google account)
- Document: Select the spreadsheet you created in the prep step
- Sheet: Sheet1
Once you select the sheet, the Values to Send section will automatically populate with your column headers (Date, Store, Amount, Category, Filename).
Column Mapping
For each field, click the Expression tab and enter the following:
Date:
{{ JSON.parse($('Message a model').item.json.output[0].content[0].text).date }}
Store:
{{ JSON.parse($('Message a model').item.json.output[0].content[0].text).store }}
Amount:
{{ JSON.parse($('Message a model').item.json.output[0].content[0].text).amount }}
Category:
{{ JSON.parse($('Message a model').item.json.output[0].content[0].text).category }}
Filename:
{{ $('Google Drive Trigger').item.json.name }}
When the mapping is correct, a live preview of the actual values (date, store name, etc.) will appear below each field. Click Execute step and confirm that a new row has been added to your Google Sheet.
Step 5: Publish to Activate the Automation
Once testing is complete, click the “Publish” button in the top right corner.
A version name popup will appear. Use a descriptive name like receipts_v1. When you add features later — say, a Gmail notification node — save it as receipts_v2. This version history lets you roll back if something breaks. The Describe changes field is optional, but a quick note like “Receipt image → Google Sheets auto-logging” makes it easy to track later.
After publishing, a “Production Checklist” popup will appear with three items:
- Set up error notifications: Sends you an alert when a workflow fails. You can skip this for now, but if this automation becomes part of your daily routine, it’s worth setting up — silent failures are easy to miss.
- Test reliability of AI steps: Evaluates how consistently the AI node performs across different receipt inputs.
- Track time saved: Logs how much manual time this automation replaces.
For now, click “Ignore for all workflows” to close the popup.
Important: The workflow only detects files added to the folder after it has been published. Any files already in the folder before you hit Publish are treated as past events and will not trigger the automation. Upload a new receipt image after publishing to confirm everything is running.
Once active, any receipt image dropped into the receipts folder will be processed and logged to your Google Sheet within about a minute.
Good to Know
- If a receipt photo is blurry or cropped, GPT-4o-mini may not be able to read it accurately. Make sure the entire receipt fits within the frame when you take the photo.
- PDF receipts work the same way — the model can read text embedded in PDFs as well.
- The workflow only runs automatically when it’s in Published state. In edit mode, you can only trigger it manually for testing.
- Get into the habit of clicking Execute step after adding each node. When something goes wrong, this makes it much easier to pinpoint exactly which step is causing the problem.
Wrapping Up
This n8n receipt automation pipeline comes together with just four nodes. The initial setup takes about 30 minutes, but after that, the time you spend organizing receipts drops to zero. Drop an image in the folder — done. Once you’re comfortable with this pipeline, try adding a Gmail notification or a Notion integration. The same node-based logic applies, and it gets faster every time.